watch on facebook
Live paint bucket tool
In this article i would be discussing about live paint bucket tool illustrator cc and live paint selection tool so here is my channel grafixers.you can find me in google and on youtube by just typing GRAFIXERS. This article will cover live shapes in adobe illustrator as well. this will create live overlapping shapes. This creates a shape with live color tool that will change color live even when you move the object.
Today i’m going to make these shapes again but using another tool that is known as live paint bucket tool.
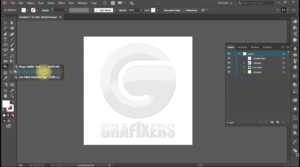
They are the three examples again same as in lecture 15 so this will be more interactive kind of lecture as compared to the lecture 15. To make this one i’m just keeping this on side and make sure you see the layer panel as well. Selecting the rounded rectangle tool or rectangle tool, this is how i made one line i just tapped on the keyboard with a key so for direct selection tool and bringing these circles down so i can make round corners and i’m going to recolor edge so you can see it better now i’m making a copy of it by just holding the alt button on the keyboard and shift to make it perfectly aligned.

Repeating the same function
Here it is and then ctrl + d for repeating this operation again.
Taking all of these going to transform and rotate and i’m rotating it to 90 degrees and making a copy so one on top of other. I will recolor these with another color like blue or orange okay now in lecture 15 i was doing shape builder tool to make this a new shape but in this lecture i’m not going to make any other shape. The live paint bucket tool is also known as live color tool.
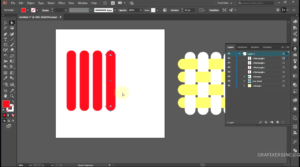
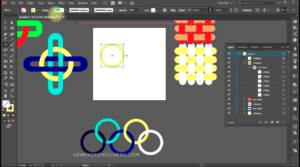
As you can see in a layer panel we have four horizontal stripes and four vertical stripes i’m just selecting all of these, going to the live paint bucket tool. As you can see on the screen i have a color swatch on top of this mouse cursor so i can change the color by pressing the left arrow right arrow up arrow and down arrow and these other colors that are used from the swatches up there number-wise.
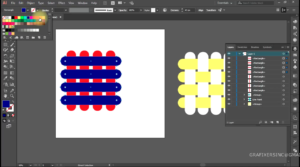
I’m just selecting the red color and i’m just clicking on this circle on this shape and i just clicked on it and it feels like it is going up from the whole inch one and in the layer panel you can see i have a live paint folder .

Live paint bucket tool folder
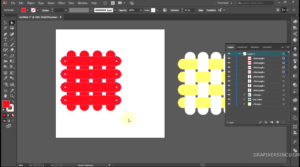
In the live paint folder i have one two three four stripes vertical and four horizontal like i had earlier. All i need to do is just making giving it a one color so leaving one and that’s going to the second part and same on this one and again this one and you can click clicking again and for the lower parts. I will have to color. This is going down and going up going down and up same here down and then up down and then up down up down and up down up down and up yes the design is already made we just coloring. This is also known as live shapes that we just made with shape builder tool. we can name them overlapping live connecting shapes. they are live color tools.
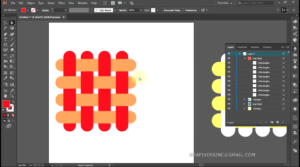
I just colored a few blocks in the shape and now what i can do with this if i change the position of any of the stripe. It will have the colors as i’m just swapping the stripe in real kind of things so if i go over here and coming back i can make changes and the shape is still having the colors .if i’m bringing this one down this one up this is a kind of interactive thing
Crons for live paint bucket tool
If i take it outside and i’m taking it outside of this square and bringing it back i will mess i’ll make a mess with the color so i’ll have to keep this design inside and if i have something overlapping each other i have to keep them overlap so if i’m taking it over here and bringing it back it will have the colors but if i take it outside of this thing still i think it’s inside let me check no it’s showing outside so i have to keep it inside the shapes i have to keep them overlapped so this is one shape made from this. the live pain bucket tool is under shape builder tool. live color tool
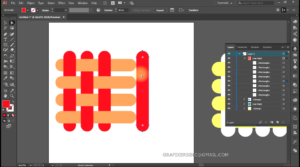
Quick process
Now i’m going to the second part over here and i’m making this shape really quick and i made a circle and after that i’m going to make one rectangle and giving it 90 degrees. Rotating it on 90 degrees and making a copy and selecting all of these i’m aligning now i’m i will be giving it stroke of 80 points yes eighty point is enough. I will have to make them fill not the outline so i’m expanding these now. What i have to do i have to just recolor these with the shape in there so i’m selecting these and going to the shape builder and by pressing the left arrow on the keyboard i’m just coloring this part this part and this part so this part has to be down so this is up up and up again down up up and up and down up up and up and this one is again down. live color tool

Change color
I’m changing the color by pressing the left arrow key this one is up up and up this one is down i can just click one by one or i can just click and drag click and drag so here is the design made. What i can do with it i can just add, if you’ve seen the panel as these are the hollow shapes that we have some empty space inside. So for each layer for each color or each rectangle in circle we have two layers for that so if i want to move anything.i will have to select these two layers so this one is the outside of the red circle and this is the inside of the red circle same again outside of the yellow stripe of ring and inside of the yellow ring outside of the green and inside of the green. live color tool
Overlapping
So i’m selecting two yellow layers and moving them and you can see that unless i’m breaking the overlapping i will have good colors so just going good if i am just messing up with the overlapping like the green is all lapping the red thing and as i’m going mixing up these three things over here then i’m making trouble for the pattern so this is how it will work now. shape builder tool is very interesting.

Stroke
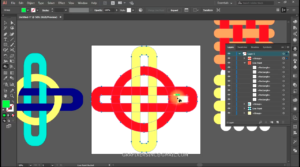
I’m going to make a moving this away i’m going to make this one so this one really quick and really easy. I have to make one circle and i will give it give it the stroke of 40 points recolor it expand it and then i’m going to make copy and copy both of these down and copy it one more time select all of these and just the size and then overlap each other by just distributing them .so i’m in trouble over here one two one two three four and five overlapping and then again distributing then overlapping little more and then distributing need more overlap. Selecting all of these distributing them. Just like these two and it’s too much down.
Things to take care of
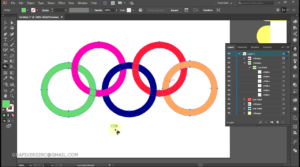
I have to make sure how to see the circle so the downwards or not of nothing. My mistake again distributing, it is better and now bringing them down and yes now. What i have to do i just have to select all of these select the live paint bucket ,recolor this or recolor we color this one i was going up now down move up up up down .so now two rings will overlap each other. So this one is going up this will be need to change the color up up up down up up up down and recolor yellow .so it will be down here up and up .sorry wrong selection making color change green so this one is up up up so here is a olympic logo made.
Live shapes
Now what we can do we can just make again these are hollow things so each layer will have two more layers so this one is pink outer. One thing you know i can move it and i will still have these things over that selecting the pink thing rather i have to make sure that these are not overlapping like this. This will affect the placement of the rings so as long as you have these layers overlapping in a good manner you will have these shape as it is. Send me your images if you get good understanding of shape builder tool.

Conclusion
Thank you very much for watching this was a live paint bucket and live paint selection tool is just for selecting multiple or single portion of it. Like this one i’ve selected this one i can delete it just like this one in the leaves like this one in delayed but you cannot delete it because it is a part of the design . I’ve selected this one i can delete this one still i have some shape over here because it’s live paint so it’s not just removing the shapes because it’s the ring.
Shift key
Holding the shift key you will have multiple selections and then you can change the color as well to yellow and anything you can make the stroke as well like if you move to the stroke you cannot see any change in the cursor so if you double click on it or press enter and selecting this paint stroke and pressing okay .
If you go to the applying of the stroke you will have a different cursor way and here how you can just change the outline of it if i still like to take off one you can see i’ve given it a stroke color as well.

Shape bulder / live paint tool / path finder
I hope you understand was the difference between the live paint bucket and the shape builder and the path finder. Most of the operation is done by these three. These are similar but still we have many differences that we can see when we do it. Like if i keep these two closer i can’t do this thing with the shape builder or pathfinder. So make sure you use this you use the right tool for the right work to make it less problematic . You can make it in less time so think about it. Feel free to offer anything anytime have a good day bye bye
FAQs
Some of the most frequently asked questions and answers relevant to the live paint bucket tool in Adobe Illustrator are:
Q: What is the live paint bucket tool in Adobe Illustrator?
A: The live paint bucket tool is a tool that allows you to fill and stroke the faces and edges of a live paint group with different colors, patterns, or gradients. A live paint group is a special type of object that treats all the paths as if they are on the same flat surface, regardless of their stacking order.
Q: How do I use the live paint bucket tool in Adobe Illustrator?
A: To use the live paint bucket tool, you need to first select the paths or shapes that you want to color and make them into a live paint group by going to Object > Live Paint > Make. Then, you can select the live paint bucket tool from the toolbar or press K on your keyboard. You can choose a color from the swatches panel or use the left and right arrow keys to switch between colors. You can then click on the faces or edges that you want to fill or stroke with the selected color.
More…
Q: How do I fix the gaps when using the live paint bucket tool in Adobe Illustrator?
A: Sometimes, you may encounter gaps between your paths that prevent you from using the live paint bucket tool. To fix this, you can go to Object > Live Paint > Gap Options and turn on the gap detection. You can also choose how large of a gap you want to stop the paint at, or manually close the gaps by clicking on them.
Q: How do I edit the paths of a live paint group in Adobe Illustrator?
A: You can edit the paths of a live paint group using any of the path editing tools, such as the direct selection tool, the pen tool, or the scissors tool. When you edit a path, the colors that were applied to the faces and edges will automatically adjust to the new regions that are formed by the edited path.
Q: How do I convert a live paint group back to a normal object in Adobe Illustrator?
A: If you want to convert a live paint group back to a normal object, you can go to Object > Expand and choose what attributes you want to expand. This will create separate paths for each face and edge with their own fill and stroke attributes. Alternatively, you can go to Object > Live Paint > Release, which will remove the live paint group but keep the original paths intact.
About
Q: How do I change the color of the live paint bucket tool cursor in Adobe Illustrator?
A: You can change the color of the live paint bucket tool cursor by going to Preferences > User Interface and choosing a different color theme. The color of the cursor will match the color of the user interface. You can also adjust the brightness and contrast of the user interface to make the cursor more visible.
Q: How do I apply a pattern or a gradient to a face or an edge using the live paint bucket tool in Adobe Illustrator?
A: You can apply a pattern or a gradient to a face or an edge using the live paint bucket tool by selecting a pattern or a gradient from the swatches panel or creating your own. Then, you can press the / key on your keyboard to switch between fill and stroke mode. You can then click on the face or edge that you want to apply the pattern or gradient to.
Q: How do I use the live paint selection tool in Adobe Illustrator?
A: The live paint selection tool is a tool that allows you to select and modify the faces and edges of a live paint group. You can access it by holding down the shift key while using the live paint bucket tool, or by clicking on its icon in the toolbar. Then you can click and drag on the faces or edges that you want to select, or use the shift key to add or subtract from your selection. You can also double-click on a face or an edge to select all connected regions. Now you can then use any of the transformation tools, such as move, rotate, scale, or shear, to modify your selection.
Informative
Q: How do I use the live paint bucket tool with other tools in Adobe Illustrator?
A: You can use the live paint bucket tool with other tools in Adobe Illustrator to create complex and colorful designs. For example, you can use the shape tools, such as rectangle, ellipse, polygon, or star, to create basic shapes and make them into a live paint group. Then, you can use the live paint bucket tool to fill and stroke them with different colors. You can also use the pathfinder tools, such as unite, subtract, intersect, or exclude, to combine or cut out shapes from your live paint group. Then, you can use the live paint bucket tool again to color them.
Q: How do I save and export my live paint group in Adobe Illustrator?
A: You can save and export your live paint group in Adobe Illustrator by using any of the file formats that support vector graphics, such as AI, EPS, PDF, SVG, or DXF. You can also rasterize your live paint group by going to Object > Rasterize and choosing your desired resolution and options. Then, you can save and export your rasterized image by using any of the file formats that support bitmap graphics, such as JPG, PNG, GIF, TIFF, or BMP.