
This is a 3D logo mockup design. You can put your logo and get the outstanding 3d effect realistic look of your flat design. The mockup has a rough background. And a perspective view from top right angle. The mockup file size is 90mb. You can use adobe photoshop to edit this mockup. The versions for the photoshop can be any higher than cs6.
Lets start to edit this 3D logo mockup
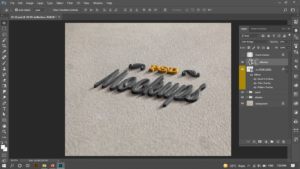
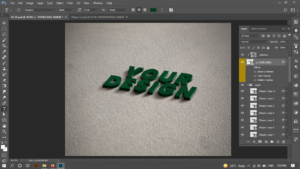
Open this mockup with adobe photoshop . I am using adobe photoshop CC 2017 version. Here is the screenshot where you can see the layer panel and the mockup file opened. The layer panel has 6 layers which include 2 folders as well named DEPTH and SHADOW.
Frame Shadow

The first layer is about the frame shadow that is effecting the whole image from the corners. You can remove the layer if you don’t want the shadow to cover the whole image. The layer is locked, now it can’t be moved or resized. Moreover you can remove this by pressing the EYE ICON in the start of the layer. As shown in the image of this 3D logo Mockup.
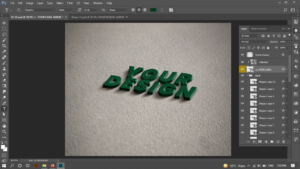
Visibility Turned Off
The 2nd layer, in the layer panel of the 3D logo mockup, is for the reflection. As you can see that there is a small arrow beside the layer, what does that small arrow mean in photoshop. It shows that this layer is attached to the layer under it. The very next layer under this layer will have this effect, and nothing else will be effected.

Place Your Design Here / Smart Object
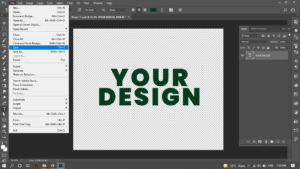
The third layer in the layer panel is the main layer, where you will place your design. Any layer which has a small square on it as shown in the image below, is known as smart object. This smart object is the main part of the mockup. You will have to double click on the smart object in each and every mockup to change the content inside the smart object. And by double clicking the smart object, you will see a new file opened in the photoshop.
Usually, smart layer is named as; “your logo here” , “place design here” , “logo” or something like this to make it easy for the graphic designer to understand which file to edit. But I would recommend to know the characteristics of the smart object, whenever you see that there is a smart object, you will directly go to that file to place your design, and there will be no need to read the file name.

Once file is opened and the design you were looking at in 3d form is now flat. You can place your design here and make sure that the deisgn file has no background. The design file that you are going to place should be in PNG format. Otherwise, whole mockup will be ruined otherwise you will see nothing .

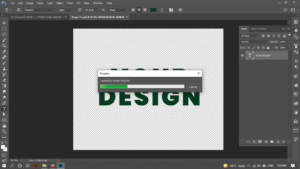
The design will not get update on the main file unless you remove or delete the old file in the smart object, and place you one here, and then save the file. If you save the new file, that is the smart object, only then this 3D logo mockup file will be updated.
Smart Object Editting
Now coming back to the original logo mockup file. Smart object consists of an icon name “fx”. ‘fx’ shows the effects are applied on this layer and what effects. You can click on the arrow next to the fx to see.

This layer consists of three different effects. Your Pc might slow down by it. If you face any issues regarding PC slowing down, you can remove these effects with the help of EYE icon with the effect.
Depth of 3D Logo Mockup
Now coming to the folder, depth. This is actually making the real depth of the logo, this folder is making your logo look 3D. Furthermore, as we can see the many layers under this folder and each and every layer is extruding the image to the small amount then the next layer is taking place and extruding the logo and so on. Each layer is the same smart object, where we placed our logo design. We don’t need to edit every smart object. This is the best part here, if we edit the smart object file, every copy of that layer in the file will get updated within seconds. And this is where the 3D logo mockups are useful.
You can remove the layers in the depth folder if you want to reduce the depth, carefully make sure to start from the bottom layer.

Shadow of Logo Mockup
Next folder is the shadow folder, this is controlling the shadow of the logo, again the smart object is here, and they are making 3 shadows here, you can use the shadow you like the most, there are no restrictions here .

Furthermore, last file is for the background and many mockup files comes with more than one background. Again, you can see a lock sign, it means it can’t be accessed easily.
